Dgraph Cloud Quick Start
Introduction
Welcome to Dgraph Cloud, the world’s most advanced, hosted GraphQL backend. By now, you should have created your first deployment, and you’re looking for a quick-start guide to test it out. Don’t worry, in this document we got you covered.
In this guide, we will create a database for a small app from the ground up using Dgraph Cloud. The easy steps you will learn in this tutorial are fundamental to using Dgraph Cloud, and mastering them will give you a better understanding of the powerful features available.
About the “to-do” App
As our example app for this guide, we’ll build a simple “to-do” list that supports adding and completing tasks for multiple users. With the help of this small app, in this article you’ll learn to:
- Create a Dgraph Cloud schema
- Apply GraphQL mutations and populate data
- Add Authorization tokens
- Test the app with a simple React UI
The Schema
The schema for our “to-do” app has only two types: Tasks and Users. The schema itself is pretty simple: it’s a standard GraphQL schema, with a few additional directives (such as @search) which are specific to Dgraph Cloud.
Let’s define the Dgraph Cloud schema for our app:
type Task {
  id: ID!
  title: String! @search(by: [fulltext])
  completed: Boolean! @search
  user: User!
}

type User {
  username: String! @id @search(by: [hash])
  name: String @search(by: [exact])
  tasks: [Task] @hasInverse(field: user)
}
The Task type has four fields: id, title, completed , and user. The title field has the @search directive on it, which tells Dgraph Cloud that this field can be used in full-text search queries.
The User type has three fields: username (the email address of the user), name, and tasks.
The username field has the @id declaration, so this field is a unique identifier for objects of this type.
The tasks field associates each user with any number of Task objects.
Let’s paste the code into the Schema tab of Dgraph Cloud and click Update Schema:

Now we have a fully functional GraphQL API that allows us to create, query, and modify records of these two types. That’s all; there’s nothing else to do. It’s there, serving GraphQL, ready to be used.
GraphQL mutations
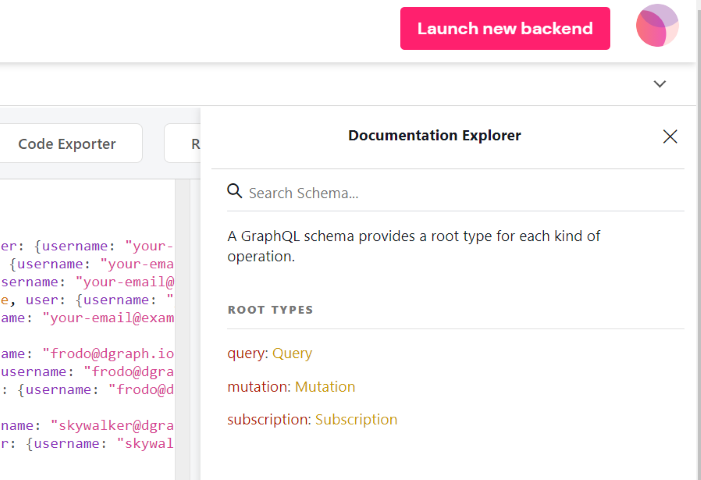
If you head over to the API Explorer tab, you’ll see the Docs tab (Documentation Explorer), which tells you the queries and mutations that your new database supports.

Next, let’s go ahead and populate some data into our fresh database.
Populating the database
Let’s create a bunch of tasks, for a few of our users:
mutation AddTasks {
  addTask(input: [
    {title: "Create a database", completed: false, user: {username: "your-email@example.com"}},
    {title: "Write A Schema", completed: false, user: {username: "your-email@example.com"}},
    {title: "Put Data In", completed: false, user: {username: "your-email@example.com"}},
    {title: "Complete Tasks with UI", completed: false, user: {username: "your-email@example.com"}},
    {title: "Profit!", completed: false, user: {username: "your-email@example.com"}},

    {title: "Walking", completed: false, user: {username: "frodo@dgraph.io"}},
    {title: "More Walking", completed: false, user: {username: "frodo@dgraph.io"}},
    {title: "Discard Jewelry", completed: false, user: {username: "frodo@dgraph.io"}},

    {title: "Meet Dad", completed: false, user: {username: "skywalker@dgraph.io"}},
    {title: "Dismantle Empire", completed: false, user: {username: "skywalker@dgraph.io"}}
  ]) {
    numUids
    task {
      title
      user {
        username
      }
    }
  }
}
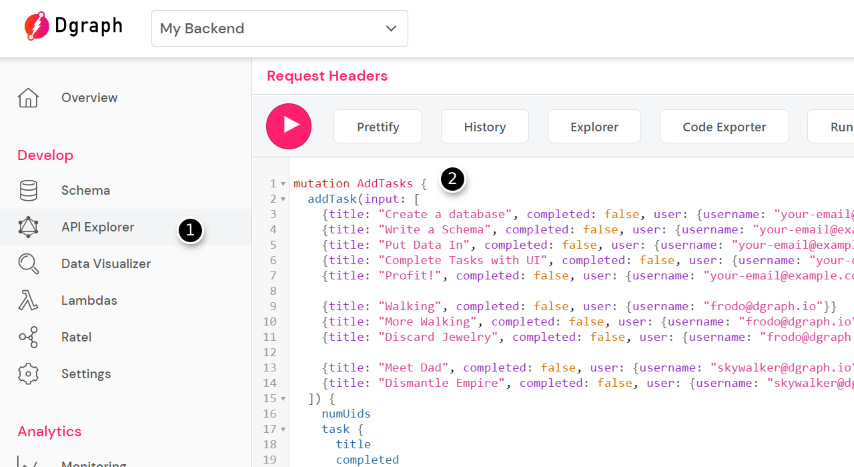
To populate the database, just head over the API Explorer tab, paste the code into the text area, and click on the Execute Query button:

Querying the database
Now that we have populated the database, let’s query back the users and their tasks:
{
  queryUser {
    username,
    tasks {
      title
    }
  }
}
As in the previous step, to execute the query, paste the code into the API Explorer, and hit the Execute Query button.
The query’s results are shown below. If you look carefully, you’ll see that Dgraph figured out that users are unique (by the username), and it has returned a single record for each user.
{
  "data": {
    "queryUser": [
      {
        "username": "skywalker@dgraph.io",
        "tasks": [
          {
            "title": "Dismantle Empire"
          },
          {
            "title": "Meet Dad"
          }
        ]
      },
      {
        "username": "your-email@example.com",
        "tasks": [
          {
            "title": "Write A Schema"
          },
          {
            "title": "Profit!"
          },
          {
            "title": "Create a database"
          },
          {
            "title": "Put Data In"
          },
          {
            "title": "Complete Tasks with UI"
          }
        ]
      },
      {
        "username": "frodo@dgraph.io",
        "tasks": [
          {
            "title": "More Walking"
          },
          {
            "title": "Discard Jewelry"
          },
          {
            "title": "Walking"
          }
        ]
      }
    ]
  },
  "extensions": {
    "touched_uids": 40,
    "tracing": {
      "version": 1,
      "startTime": "2020-08-15T12:59:14.577795285Z",
      "endTime": "2020-08-15T12:59:14.580373297Z",
      "duration": 2578026,
      "execution": {
        "resolvers": [
          {
            "path": [
              "queryUser"
            ],
            "parentType": "Query",
            "fieldName": "queryUser",
            "returnType": "[User]",
            "startOffset": 79480,
            "duration": 2422504,
            "dgraph": [
              {
                "label": "query",
                "startOffset": 125039,
                "duration": 2291416
              }
            ]
          }
        ]
      }
    },
    "queryCost": 1
  }
}
Authorization
Now that we have a working schema, let’s update the original code and add some access authorization. We’ll update the schema so that users can only read tasks that they own (for example, this change would prevent Frodo from reading Luke’s tasks).
type Task @auth(
  query: { rule: """
    query($USER: String!) {
      queryTask {
        user(filter: { username: { eq: $USER } }) {
          __typename
        }
      }
    }"""}), {
  id: ID!
  title: String! @search(by: [fulltext])
  completed: Boolean! @search
  user: User!
}

type User {
  username: String! @id @search(by: [hash])
  name: String @search(by: [exact])
  tasks: [Task] @hasInverse(field: user)
}

# Dgraph.Authorization {"Header":"X-Auth-Token","Namespace":"https://dgraph.io/jwt/claims","Algo":"RS256","Audience":["Q1nC2kLsN6KQTX1UPdiBS6AhXRx9KwKl"],"VerificationKey":"-----BEGIN PUBLIC KEY-----\nMIIBIjANBgkqhkiG9w0BAQEFAAOCAQ8AMIIBCgKCAQEAp/qw/KXH23bpOuhXzsDp\ndo9bGNqjd/OkH2LkCT0PKFx5i/lmvFXdd04fhJD0Z0K3pUe7xHcRn1pIbZWlhwOR\n7siaCh9L729OQjnrxU/aPOKwsD19YmLWwTeVpE7vhDejhnRaJ7Pz8GImX/z/Xo50\nPFSYdX28Fb3kssfo+cMBz2+7h1prKeLZyDk30ItK9MMj9S5y+UKHDwfLV/ZHSd8m\nVVEYRXUNNzLsxD2XaEC5ym2gCjEP1QTgago0iw3Bm2rNAMBePgo4OMgYjH9wOOuS\nVnyvHhZdwiZAd1XtJSehORzpErgDuV2ym3mw1G9mrDXDzX9vr5l5CuBc3BjnvcFC\nFwIDAQAB\n-----END PUBLIC KEY-----"}
Dgraph Cloud allows you to pass JSON Web Tokens (JWTs) with custom claims as a header, and will apply rules to control who can query or modify the data in your database. The @auth directive controls how these rules (filters generated from the JWT token) are applied.
In our schema, we specify that one can only query tasks if the tasks' user has a username that matches $USER, a field in the JWT token.
The Authorization magic comment specifies the header where the JWT comes from, the domain, and the key that signed it. In this example, the key is tied to our dev Auth0 account. More information on how this works is available in this article.
To verify these access changes, let’s try querying back the tasks:
{
  queryTask {
    title
  }
}
We should be getting an empty result this time, since we no longer have access to the tasks.
Testing it out with a simple UI
To test our work, we’ve built the app’s frontend with React, so you can use it to close the tasks off.
Let’s head over to our sample React app, deployed at https://relaxed-brahmagupta-f8020f.netlify.app/. When running the React app, remember to use the GraphQL Endpoint shown in your Dgraph Cloud Dashboard.
You can try creating an account with your email, or log in with the following user/password credentials:
frodo@dgraph.io/passwordskywalker@dgraph.io/password(like the first Death Star, Luke wasn’t big on security)
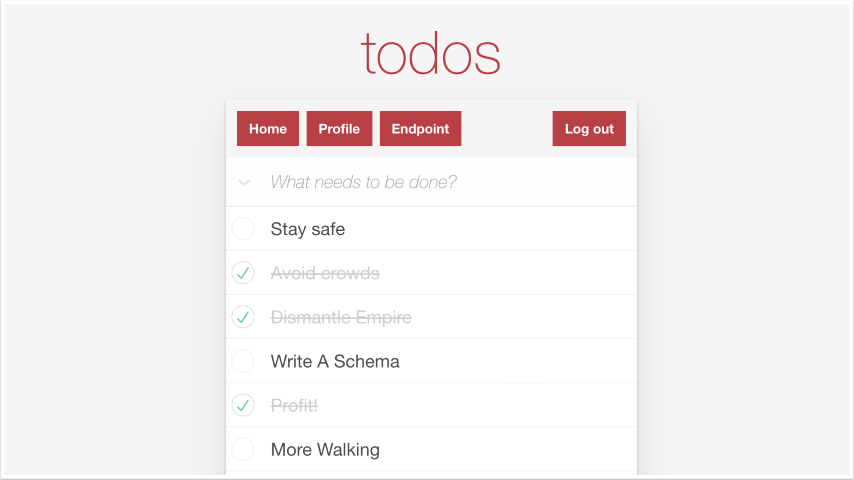
Once you have logged in, you should see something like:

Congratulations! You have completed the Dgraph Cloud quick-start guide, and you are ready to use the world’s most advanced, hosted GraphQL backend in your applications.
Next Steps
To learn more about the Dgraph Cloud managed service, see Administering your Backend and Advanced Queries.